Technology FAQs
Please select from the following FAQ categories.
Account Information (6)
Once you are logged in to Google, go to https://myaccount.google.com/security#signin and proceed from there.
Students are issued network and google accounts in Kindergarten. Students in grades K-5 do not have email access. Students in grades 6 and 7 have email access within our domain (@apcsd.org) and students in grades 8-12 have full email access.
How to Change Your Password on Your Chromebook
Start by opening a new Chrome browser window.

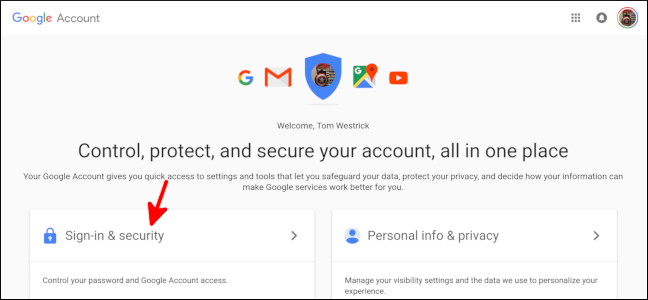
Select your profile photo in the upper-right, then select Google Account.

Select Sign-in & security.
Scroll down until you see the Signing into Google section, then select “Password.”

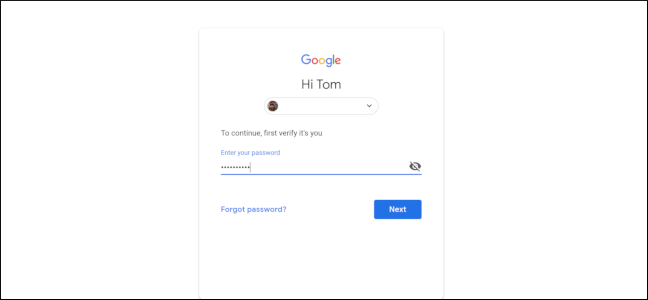
Enter your current password.
The Human Resources Dept. will request an account so you can use the network. Please see someone in HR if you need a network account.
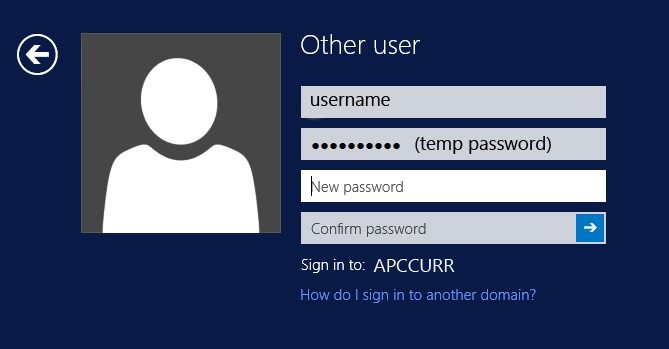
You will be given a username and password from the Human Resources Department.
You will need to log on to a device on the APCSD network on campus.
Once you login you will be prompted to change your password OR you can hit the Ctrl + Alt + Delete and select change password, this is where you will create your new password.
This new password will be the same one you will use to log on to our WIRELESS network.
Use your network (apccur) account and not your google (@apcsd.org) account.
User Name Scheme as follows:
Employees: Last Name + First Initial
Students: Graduation Year + Last Name + First Initial
Example John Doe with a 2023 graduation year is 23doej
Chromebook (22)
Please try rebooting if this does not resolve the issue the Technology Office will have to repair the device for you.
We realize that customizing your chromebook is fun and helps it stand out from everyone else’s chromebook
You can customize your chromebook with a protective cover.
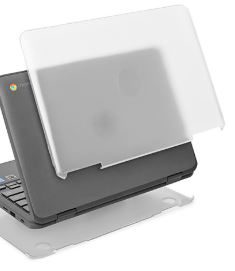
There are many different styles, check your model number to insure a proper fit.
Once you have your case on you can put stickers on it. HOWEVER please do not put stickers DIRECTLY on your chromebook. There may be a time your chromebook needs to be replaced or could be used for another student or staff member. Peeling stickers off equipment is time consuming and could damage the device.
Employees can send a secure print job from a chromebook.
1) On your chromebook you have an extension called uniflow online – click on it to login with your gsuite acct. The extension looks like this:
2) Go to print something and select the printer called secure_print_uniflow. (when you print – destination – click on “see more” to see available printers)
3) Walk up to a printer that has uniflow installed and select the Secure print icon (see picture below). Uniflow is installed on:
- APHS Faculty Room
- AMS GUidance Office
- MHSL Faculty Room
- PES Faculty Room
- WSL TCA Office
4) Click the secure print icon on the copier – login with your 4 digit employee id and you should see your print job – you can now release the job. If you do not know your 4 digit pin, it is on your paystub or give HR a call and they can look it up for you.
Here is the icon:
If your Chromebook is crashing or freezing:
- Turn off your Chromebook, then turn it back on.
- Close all your apps and browser windows.
- If a specific tab in your browser causes your Chromebook to crash or freeze, hard refresh the page: Ctrl + Shift + r.
- If you’ve installed any new apps or extensions recently, uninstall them.
- Reset your Chromebook.
- Recover your Chromebook.
Power on your chromebook
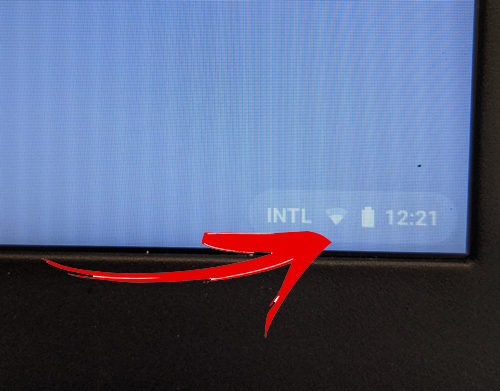
Click on the wifi symbol at the bottom right hand corner of the screen
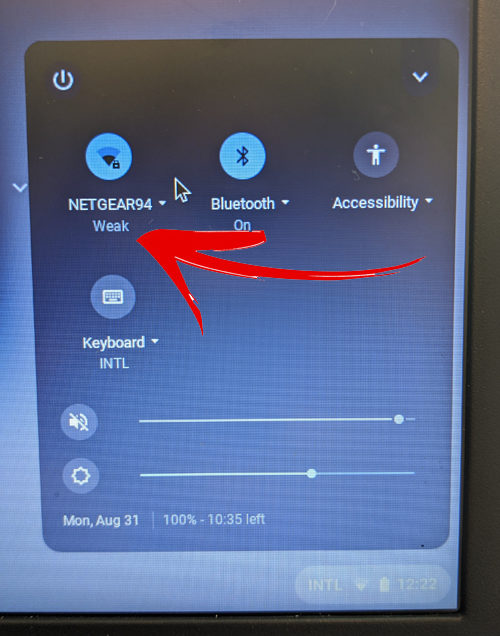
click on your wifi
Click on Forget
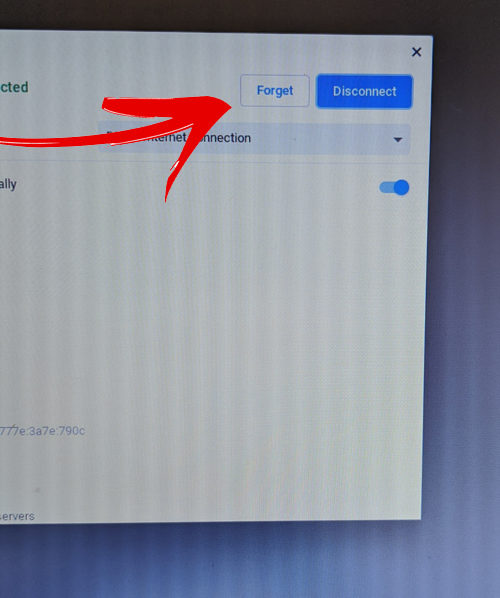
Now connect your wifi again. This tends to clear out any issues you may have with wifi.
First, check if the battery is charging by plugging your Chromebook into a power outlet. (Usually, you’ll see a light turn on.)
If your Chromebook is charging, let it charge for at least 30 minutes.
If your Chromebook still isn’t charging:
- Check if the charger or adapter cables are completely plugged in, both to your Chromebook and the wall.
- Make sure that the power outlet is working.
- Unplug your charger from the wall and your Chromebook.
- Plug your charger back in to your Chromebook, then the wall.
- Charge the device for at least 30 minutes.
IMPORTANT – Trouble Shooting information
– We ask that when you charge the battery, you plug the charger directly into the wall outlet and not a power strip.
– Notice that there is a charging port on both the right side and the left side of the chromebook.
If you are having a problem charging it on one side, please try the other side.
Please try not to let the battery get less than 20% charged.
If for some reason you cannot power on the chromebook, please try the following:
Unplug the Chromebook from the charger.
Then, hold the power button down for 8 seconds.
Finally, release the power button, plug back in to the charger and press the power button normally to power on.
If the Chromebook still does not power on press and hold power for 8 seconds again (you can leave the charger plugged in), release power then press the refresh key and the Power button and release both keys.
The following are general handling and care of your Chromebook.
Charging
• SHUT DOWN the Chromebook by pressing the power button at the end of every day. This will prevent unnecessary drain on the battery and speed up charging time.
• Avoid bending the charger’s cord at sharp angles.
• Position your charger so that you won’t roll over the cord with a chair, or catch the cord in the sharp edges of desk drawers.
• Be careful and gentle as you connect and disconnect the power cord.
Exposure
• Keep liquids away from your Chromebook. Liquids damage the electronic components of your
chromebook causing corrosion.
Dropping
• Dropping may cause damage to internal parts or lead to a broken screen or other damage.
• Keep your Chromebook away from the edges of tables and desks.
• If walking away from your desk, make sure you close the chromebook lid.
The Screen
• Your Chromebook’s LCD Display is a sensitive component. If you drop your Chromebook, slam the lid shut, and/or expose it to excessive pressure or weight, it may crack.
• Make sure you don’t have anything between the screen and keyboard as you close the case.
• Make sure you don’t put anything between the device and the case it resides in.
• Don’t place items on top of your Chromebook as the weight can cause damage to the
screen.
• Use a damp (water), soft, lint-free cloth to clean the computer’s screen and exterior. You can also use packaged pre-moistened eyeglass lens cleaning tissues to clean the screen.
• Avoid getting moisture in any openings. Do not spray liquid directly on the computer.
• Don’t use aerosol sprays, solvents, or abrasives.
Carrying
• Be sure to use both hands if you are moving your Chromebook when it is in the open position.
• Never lift or carry your Chromebook by the screen as you can break the screen. It is safer to close the Chromebook before moving.
• Don’t squeeze your Chromebook case. You can damage internal components and/or the screen.
Authorized users
• The Chromebook is assigned to you for your use alone.
• Don’t allow others to use your Chromebook.
• Remember you are responsible for any damage or misuse.
• Keep away from small children and pets.
• Keep Chromebook in a secure area when not in use. Do not leave your Chromebook sitting in an empty classroom or any other area.
Leave Repairs to Experts
• Under no circumstances should you open and attempt to repair your Chromebook.
Touching the wrong components may not only damage the computer, it may void the warranty and seriously hurt you. Let a district technician handle any repairs.
Now that we are using our home internet more we have had many questions on speed and connection. Below are some tips to help you improve the functionality of your home network.
Before we begin, take an internet speed test. You want to know the speeds you have now so you can compare results as you go through each step—that way you know if it’s helping.
After you get your results, compare them to the speeds you’re supposed to be getting from your internet service provider (ISP). You can find this in your online account or on your internet bill. That way you know if your speeds are actually underperforming, or if it’s just time to upgrade to a faster plan.
If your speeds are near where they should be, but you find yourself running into internet speed issues, you’re probably overwhelming your current connection and need a faster internet plan.
1. Turn things off and on again.
Do it to your router. Do it to your modem. Do it with the devices you have connected to Wi-Fi. Everything needs a break once in a while—but especially your modem and router.
Your modem translates internet signals between your home network and the ISP. If your internet is acting up, resetting your modem is a good place to start troubleshooting. You may be able to fix modem issues with a quick power cycle. Sometimes you have to call your internet provider to reset your modem on its end to make sure your modem is properly calibrated to be compatible with your ISP’s signals.
Your router could also benefit from a quick reset to clear its memory and give it a fresh start on tasks that were bogging it down before.
It might seem simplistic, but turning your home networking equipment off and on again can really give your network a boost. We recommend rebooting your equipment regularly—at least once every few months.
2. Move your router to a better location.
Wi-Fi can travel only so far, and its signals can get interrupted or blocked by walls, floors ceilings, furniture, appliances, and basically any large physical object. They can also get interrupted by radio waves from other devices, including cordless phones, baby monitors, microwaves, and Bluetooth speakers.
So if your router is stuck in a corner of your home, you may have issues with Wi-Fi at the other end of your home. The best place for your router is in a central location, near where you use the internet most often. Don’t relegate your router to a basement or closet—that’s just setting yourself up for connectivity issues.
3. Adjust your router’s antennas.
Many routers have internal antennas—meaning that they’re built in to the body of the device and you can’t adjust them. If that’s the case for you, skip this step.
But if you do have adjustable antennas on your router, try reconfiguring them. Router antennas are usually omnidirectional, which means they send out signals in all directions perpendicular to the antenna. For example, a vertical antenna sends out Wi-Fi signals horizontally, and vice versa. So if you need to stretch your Wi-Fi signals to multiple floors, adjusting an antenna to sit horizontally to spread Wi-Fi signals up and down could help.
4. Make sure you’re on the right frequency band.
Modern routers work primarily on two radio frequency bands: 2.4 GHz and 5 GHz. The band you use for your connections can affect your speeds and the quality of your connections at different distances from your router.
The 2.4 GHz band has been used for Wi-Fi since the beginning, but it’s also used for a ton of other wireless communications, so the airwaves in this frequency can be a little crowded. This band also has slower max speeds than 5 GHz, but its range is better.
The two frequency bands often appear as two separate Wi-Fi networks. So to reorganize your connections, you should log off incorrect bands and reconnect to the correct band on each device.
Connections best for 5 GHz band:
- Gaming consoles
- PCs
- Smartphones
- Smart TVs
Connections best for 2.4 GHz band:
- Smart speakers
- Smart home devices
- Security cameras
5. Prune unnecessary connections.
If you’re running low on bandwidth, you should prioritize your connections. Everything connected to your network should be essential.
Going through all your network connections may take a while, but the simplest way of doing it is to change your Wi-Fi passwords. Then you’ll have to log back in to your network with the new password on every device you use. This is a good way to clear unnecessary connections that you may have forgotten about—for example, that emergency cell phone you keep turned on that has been quietly downloading updates.
6. Change your Wi-Fi frequency channel.
Beyond making sure your connections are on the correct Wi-Fi frequency band, you can also change your router’s frequency band channel. Basically, there are a few different channels within each frequency band, and you can choose which one to use. Most routers automatically choose this for you, but they sometimes choose wrong.
Frequency channels can get crowded, so if you and all your neighbors are using the same channel in the 2.4 GHz frequency band, that could affect your Wi-Fi speeds. To find the best Wi-Fi channel, you can use the Wireless Diagnostics feature on a Mac computer (hold the option key and click the Wi-Fi status bar in the top right corner of your screen to access). For Windows, you’ll need an app like NetSpot. Both of these should recommend the best Wi-Fi channels to use.
To change your Wi-Fi to the best channel, you’ll need to go to your router’s online interface. You can do this by typing your router’s IP address into a web browser and logging in. Once logged in, look for your Wi-Fi settings. The option to change your band channel should be there.
7. Update your router’s firmware.
Since you’ve already logged in to your router’s interface to check your Wi-Fi channel from step six, you might as well check to see if there are any available firmware updates. Updating your router keeps it as secure as possible and up to date with the latest software fixes for known problems.
Many newer routers have automatic firmware updates, but if your router doesn’t, you should periodically check for them to make sure your router works as fast as possible.
8. Replace your router.
Tech advances quickly. A top-of-the-line router from just a few years ago may not cut it anymore, especially if you’ve added more devices to your network or have moved to a larger home. And if the last time you replaced your router was before 2014, you’re probably working with one that’s two Wi-Fi generations old.
Wi-Fi 6 (802.11ax) is still fairly new, but it’s much better at organizing connections between multiple devices than its predecessors. That also makes it better for home networks juggling multiple smart home devices, computers, tablets, and smartphones at the same time. But Wi-Fi 6 routers are still pretty expensive.
Routers with the previous Wi-Fi 5 (802.11ac) standards are more accessible and still good buys. When shopping for a new router, we recommend looking for one that uses both 2.4 GHz and 5 GHz frequency bands, uses a network management app, and is capable of handling top speeds that are faster than your current internet plan.
9. Extend your Wi-Fi network.
If your router is in a perfect, central location but you’re still having speed or connectivity issues in certain areas of your home, you may need to add a device that can stretch your network’s range.
There are a few different devices you can use to increase the reach of your network:
- Wi-Fi boosters sit between your router and the dead zone and either amplify or redistribute existing Wi-Fi signals into the new area.
- Wired access points connect to your router via an Ethernet cable and can distribute Wi-Fi and LAN signals as an extension of your router, similar to a Wi-Fi booster. Many devices can be used as access points, including old routers.
- Powerline extender kits come with two devices—you connect one to your router via Ethernet and plug it into an outlet. You plug the second one in where you want better Wi-Fi, and the internet signals travel through your electrical wiring.
- Mesh Wi-Fi systems replace your router with one or more devices that work together to create a Wi-Fi network that covers your whole home from multiple points.
While all these work to push your Wi-Fi farther, the best one for your network depends on what your home is like. If you have just one stubborn dead zone, a booster would probably be a good fit. Mesh systems are better for full-house coverage if your home is particularly large or has a complicated layout. And using an access point would be ideal if your house is wired with Ethernet.
10. Upgrade to faster internet.
While we hope these tips will do the trick for you, sometimes your internet connection is simply too slow to sustain your internet consumption. If that’s the case, you’ll need to upgrade to a faster internet plan to get better Wi-Fi speeds.
Unsure what internet speeds you need to support your online habits? Check out our guides to internet speed for online gaming and video streaming requirements.
-
- Select the first App you want to have on your screen, click its Maximize/Restore button (see screenshot below) and hold down the mouse button (or trackpad, touchscreen etc). An ‘arrow’ will appear on each side of the Maximize/Restore button. Select the arrow on the left.

-
- The App will be sent to the left side of your screen and resized to fit perfectly.

-
- Now locate the other App you want to have on your screen, click and hold down its Maximize/Restore button and this time select the arrow on the right.

-
- The two Apps will now share the screen equally.

- You can repeat the above steps with other Apps and assign them one side of the screen or the other.
- If you’re a keyboard-shortcut person you’re in luck – you can use them for split-screen on a Chromebook too! When you want to have an app take up the left side of your screen, use the keyboard combination Alt + [ When you want an app to take up the right side of your screen, use the keyboard combination Alt + ]
How to Change Your Password on Your Chromebook
Start by opening a new Chrome browser window.
Select your profile photo in the upper-right, then select Google Account.
Select Sign-in & security.
Scroll down until you see the Signing into Google section, then select “Password.”
Enter your current password.
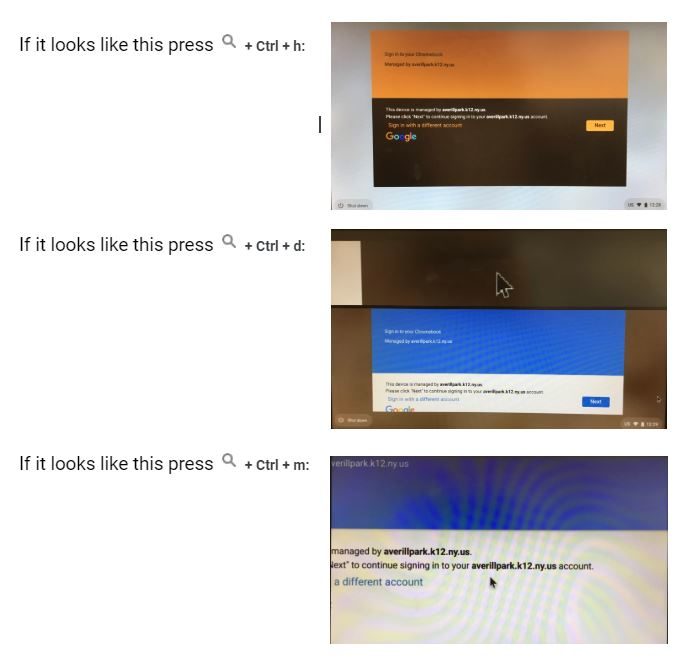
Power on the Chromebook
Login with your @apcsd.org credentials
The Chrome OS will now load and you are ready to use the chromebooks.
If you have misplaced your chromebook please contact the school immediately. The Technology Office will look on our network for the last login location of the device.
If the device is unabled to be located unfortunately there is a cost associated with a replacement device. Please contact your School for more information.
A Broken screen or Nonfunctional Screen will look dark even when the power light is on or you will see a faint back light.
The Technology Department will have to replace the screen at no cost to the user.
If the screen is broken it will look like this
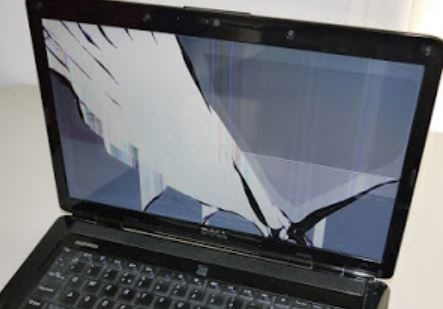
The Technology Department will have to replace the screen. This does come at a cost, please contact your school for more information.
First turn off your Chromebook completely (don’t just close the lid).
Locate the 3 dots in the corner of your chrome browser
On the drop down Menu click on SETTINGS
Type in Camera
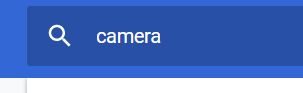
scroll down and click on SITE SETTINGS
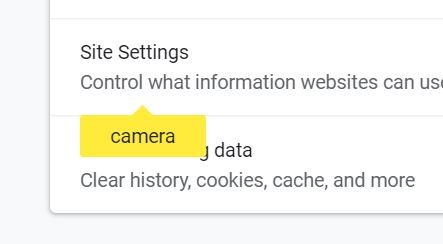
Click on Camera
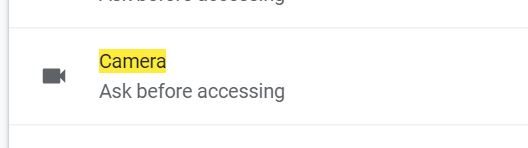
Your setting should look like this
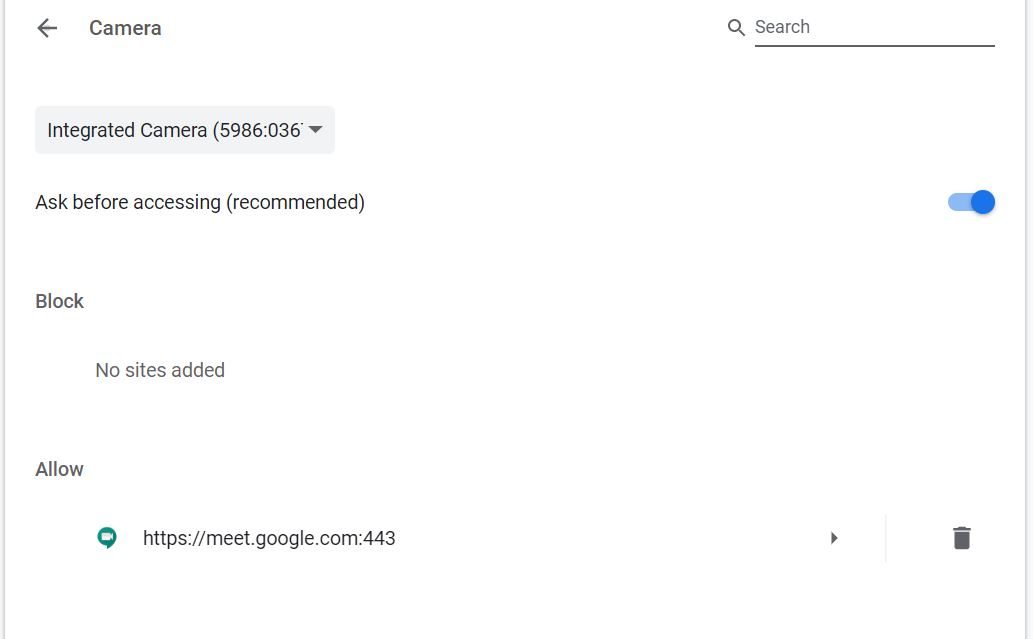
Make sure Ask Before Accessing is ON if it is not turn it to ON. If it is already On turn it OFF then ON again

1. Make sure there is no dust or dirt on the touchpad. A good cleaning may be in order. Use a soft cloth to wipe away any dust or dirt that’s on the touchpad. Also, use a can of compressed air to puff out anything that’s in the cracks or under the touchpad.
2. Drumroll your fingers on the touchpad for ten seconds. Drumming your fingers on the touchpad causes vibration, which can loosen specks of dirt and jostle the debris out of the way.
3. Press the Esc key several times. The Esc key stops loading the current page. If something on the page is causing your computer to malfunction or freeze, pressing Esc a few times can interrupt the process and get things back to normal.
4. Turn the Chromebook off, then back on again. There’s a reason why everyone in tech support says to restart your computer. It often works. Press and hold the Power button until the Chromebook turns off, give it a full minute, then turn it back on.
5. Perform a hard reset. A hard reset of your Chromebook doesn’t affect any files on the computer, but it can resolve several problems. Hold the Power button until the Chromebook turns off, then press the Power and Refresh buttons at the same time to reboot and reset the computer.
6. Change how the touchpad works. Go to Settings > TouchPad and turn off features like tap-to-click, touchpad acceleration, and touchpad speed. Changing that behavior might get the touchpad working again.
If the above steps do not resolve your issue you can use an external mouse and schedule a time for the Technology Office to repair your chromebook.
Locate the 3 dots in the corner of your chrome browser
On the drop down Menu click on SETTINGS
Next type in Microphone hit enter
![]()
scroll down and click on SITE SETTINGS
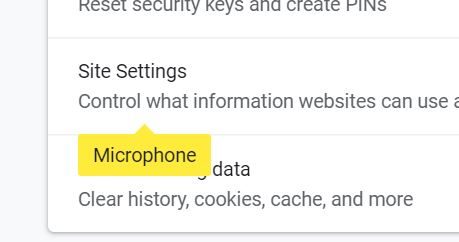
Click On Microphone
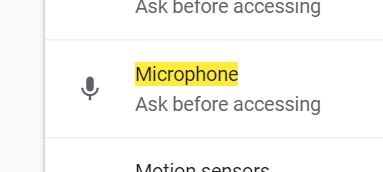
Your setting should look like this.
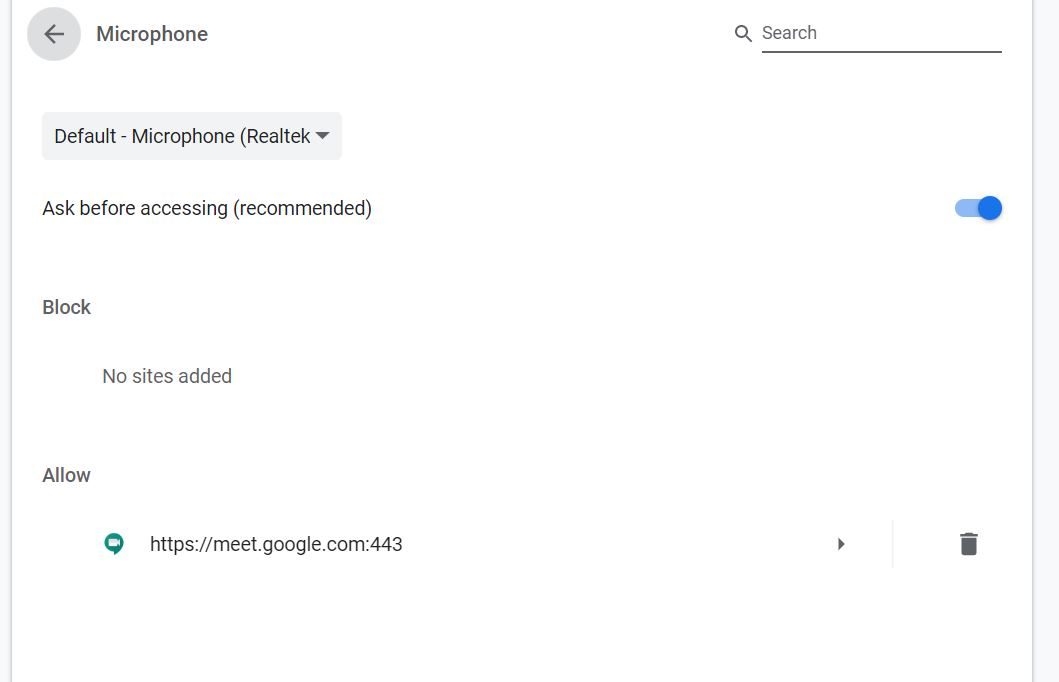
Make sure Ask Before Accessing is ON if it is not turn it to ON. If it is already On turn it OFF then ON again
On occasion you will need to clear your chromebooks cache.
In Chrome
- On your computer, open Chrome.
- At the top right, click More
.
- Click More tools
Clear browsing data.
- At the top, choose a time range. To delete everything, select All time.
- Next to “Cookies and other site data” and “Cached images and files,” check the boxes.
- Click Clear data.
Teachers can request that extensions be added to our list of “allowed” extensions. We cannot risk unblocking all extensions as there are some that are not safe to run in a school environment. Teachers can request extensions by contacting the District Technology Office.
Many of you might prefer to use your personally owned computer/tablet but we ask that students use a school issued device. Your child’s classroom teacher uses applications such as Google Classroom, Clever and SeeSaw to help manage the workflow. The school Chromebooks work seamlessly with these applications while the student is logged in with their @apcsd.org account. We have also taken many measures to protect the student’s data and identity by only allowing applications/extensions where the vendor has agreed to our strict privacy policy. From experience we know that when a student uses a “shared” home device during remote learning, it can cause difficulties/challenges for them and the teacher.
If you have any further questions or concerns, please reach out via email to
Google Apps FAQ (13)
https://support.google.com/calendar/answer/37082?hl=en
When you sign in to the Chrome browser, you can save and sync things like your bookmarks, history, passwords, and other settings to your Google Account, so you can get to them on any device.
You should only sign in to Chrome from trusted computers. To keep your data safe, we recommend you don’t sign in if you’re on a public computer.
- Open Chrome.
- In the top right, click the button with your name or the person icon
.
- Click Sign in to Chrome.
- Sign in with your Google Account.
- To customize your sync settings, click Settings. This lets you choose what information to share across other devices where you’re signed into Chrome.
Email Groups
If you want to send an email to a group of people, these email groups have already been established:
| aphsfaculty@apcsd.org | AP High School Faculty |
| aphsstaff@apcsd.org | AP High School Staff |
| amsfaculty@apcsd.org | Algoquin Middle School Faculty |
| amsstaff | Algonquin Middle School Staff |
| mhslfaculty@apcsd.org | MHSL Faculty |
| mhslstaff@apcsd.org | MHSL Staff |
| pesfaculty@apcsd.org | Poestenkill Faculty |
| pesstaff@apcsd.org | Poestenkill Staff |
| wslfaculty@apcsd.org | West Sand Lake Faculty |
| wslstaff@apcsd.org | West Sand Lake Staff |
| admin@apcsd.org | Administrative Team at APCSD |
| do@apcsd.org | District Office Staff |
| poquestions@apcsd.org | Purchase Order Questions |
| cafe@apcsd.org | All Food Service Employees |
| mentors@apcsd.org | Mentors |
| mentees@apcsd.org | Mentees |
| firstyearmentees@apcsd.org | First Year Mentees |
Click here for instructions. Click on Google for your phone.
Once Drive File Stream is installed on your computer, just click on the icon for it and login with your @apcsd.org credentials. Once you login, you will have a mapped drive (g:) that shows the contents of your google drive.
- Your browsing data, like your bookmarks, history, passwords, and other settings, are saved and synced to your Google Account. That way, your data is available on any device where you sign in to Chrome with the same account. And, any changes you make to your data on one device sync to all the devices where you’re signed in to Chrome.
You can log into Google Apps from any browser (Chrome, Firefox, Safari, etc).
You will be able to access email and the core suite of Google Apps (Drive, Docs, Sheet, etc.)
If you sign in using the Chrome Browser, you have two additional features:
You can install Chrome Apps and Extensions to use within the Chrome Browser.
Signing in to Chrome brings your bookmarks, history, extensions, apps, and other settings to all your devices.
Hardware (9)
All requests for equipment must come from an Administrator. Please see your building Administrator with all requests.
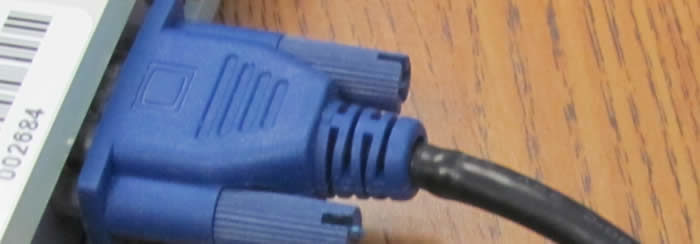
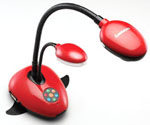
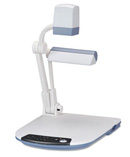
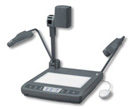
You will need the device and a VGA cable. In this example we will use an Document Camera (a/k/a Elmo)
Document Camera
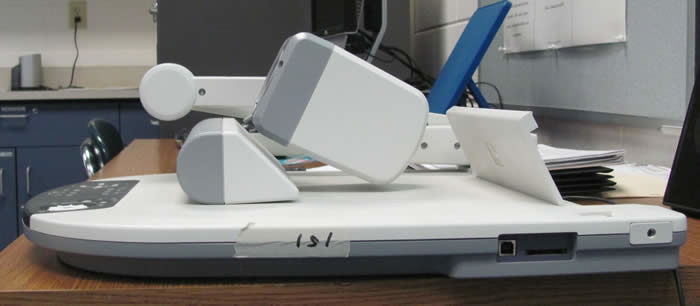
VGA Cable – connect one end to the wall plate and the other end to the document camera
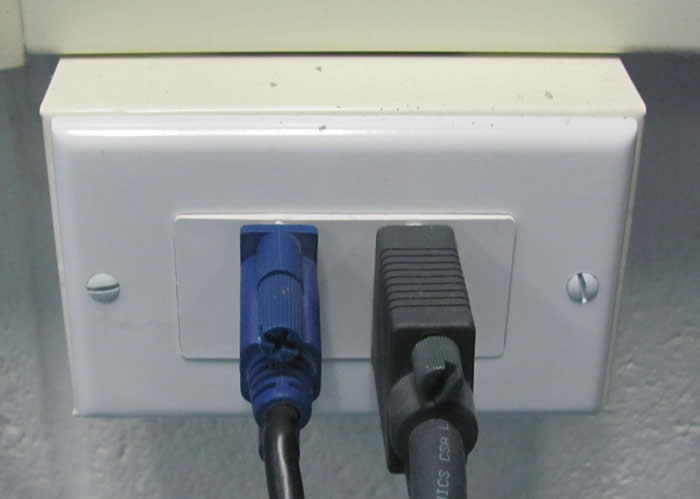 |
 |
After you have connected the vga cable – turn on the projector and hit the “search source” button next to the power button
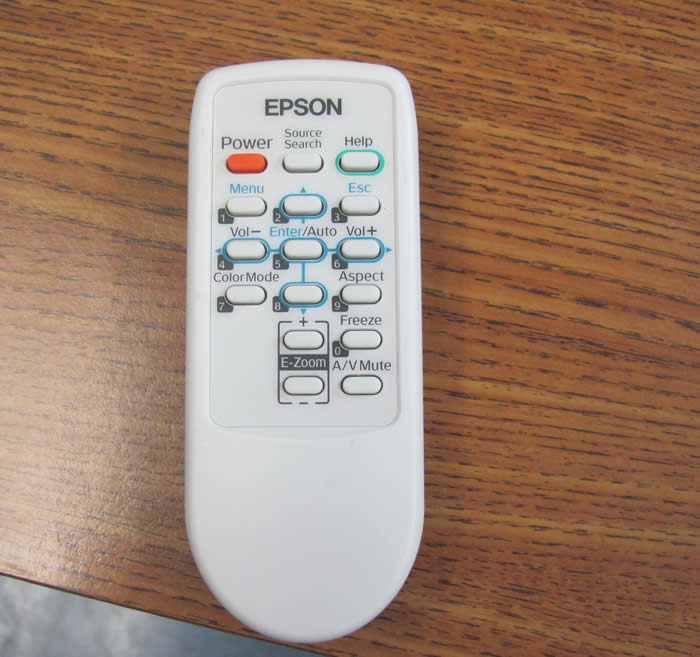
Your projector will now show the image from your document camera.
To get your projector to go back to the image from your computer, just hit “search source” again.
You can borrow a document camera from the library at your school.
After logging into the chrome book click on the login image at the bottom right hand corner
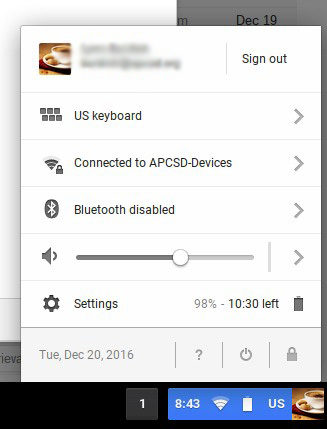
Click on the arrow to the right of the sound control
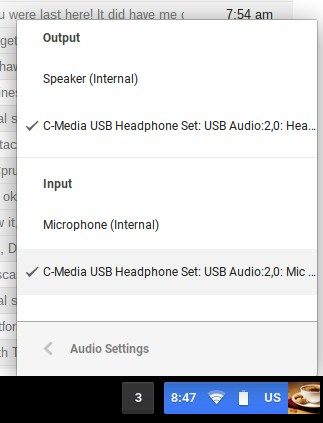
Choose the type of headphones you have and click on them to make sure they have a check near them. If you have a microphone do the same under the input section. This will allow your headphones to work on a chromebook.
Vivi is a solution for projecting to a projector wirelessly. As of Fall 2022, Vivi is available at the Middle School and in Grades 4 and 5 classrooms and some SPED room at the Elementary level. We have also installed vivi in the main conference room at each school and the District Office.
Best Practice for using with your projector:
- use the web interface rather than the app (app.vivi.io)
- when you share the screen, share just the chrome tab and then go into full screen (3rd button over from escape on the keyboard).
- Projector aspect ratio in 4:3
To use vivi you must be on the school wifi (apcsd) and you can go to app.vivi.io to get started. You will be prompted to login with your @apcsd.org account.
More information is available here.
iPads (2)
Each school in the district has Ipads that you can borrow from the Library. See your Library Media Specialist for procedure on reserving the Ipads in your building. Some special area teachers also have Ipads to use for curriculum and instruction.
Complete the app request form that you can find here:
https://docs.google.com/document/d/1rjjQpOJBBH0qg-Dpi5tiBvqDDo8gj3N1RElHwR63DeQ/copy
Printers/Copiers (4)
Employees can send a secure print job from a chromebook.
1) On your chromebook you have an extension called uniflow online – click on it to login with your gsuite acct. The extension looks like this:
2) Go to print something and select the printer called secure_print_uniflow. (when you print – destination – click on “see more” to see available printers)
3) Walk up to a printer that has uniflow installed and select the Secure print icon (see picture below). Uniflow is installed on:
- APHS Faculty Room
- AMS Guidance Office
- AMS Library
- MHSL Faculty Room
- PES Faculty Room
- WSL TCA Office
4) Click the secure print icon on the copier – login with your 4 digit employee id and you should see your print job – you can now release the job. If you do not know your 4 digit pin, it is on your paystub or give HR a call and they can look it up for you.
Here is the icon:
How to use the email feature on the Xerox D125, 5955, and 3655
- -Hit the All Services Home Button
- -Select email
- -Select Network Address Book
- -Type the first few letters of the last name of the person you want to send the email to…example smi (for smith)
- -Select Search N(blue magnifying glass icon)
- -The search will return a list of people that meet your search criteria
- -Highlight your desired recipient – select TO:
- -Now put the document in the feeder and hit start (green button)
- -Your document will be emailed to the recipient
- NOTE – you can email to anyone in our domain @apcsd.org
How to use the email feature on the Xerox Workcentre 5225
- -Hit the all Services Button
- -Select email
- -Select Address book
- -Type the first few letters of the last name of the person you want to send the email to…example smi (for smith)
- -Search (icon looks like a magnifying glass)
- -The search will return a list of people that meet your search criteria
- -Highlight the desired recipient and hit the arrow to put them in the recipients column (to)
- -Hit close
- -Now put the document in the feeder and hit start
- -Your document will be emailed to the recipient
- NOTE – you can email to anyone in our domain @apcsd.org
How to use the email feature on the Xerox 5735
- -Hit the Services Home button
- -Select email
- -Select new recipient
- -Type the first few letters of the last name of the person you want to send the email to…example smi (for smith)
- -Search (icon looks like a magnifying glass)
- -Highlight the desired recipient – add to
- -Hit close
- -Now put the document in the feeder and hit start
- -Your document will be emailed to the recipient
- NOTE – you can email to anyone in our domain @apcsd.org
search for a printer at your location
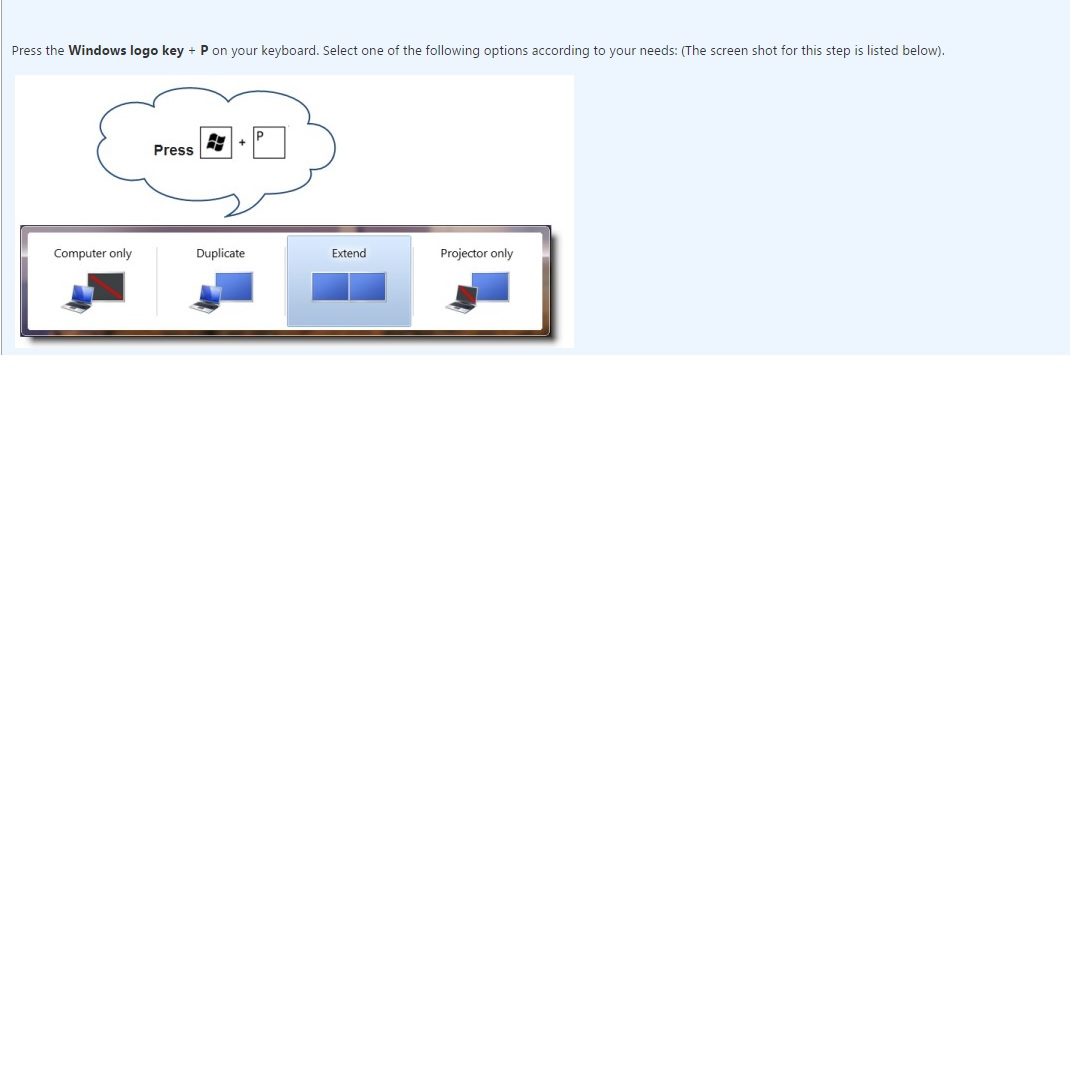
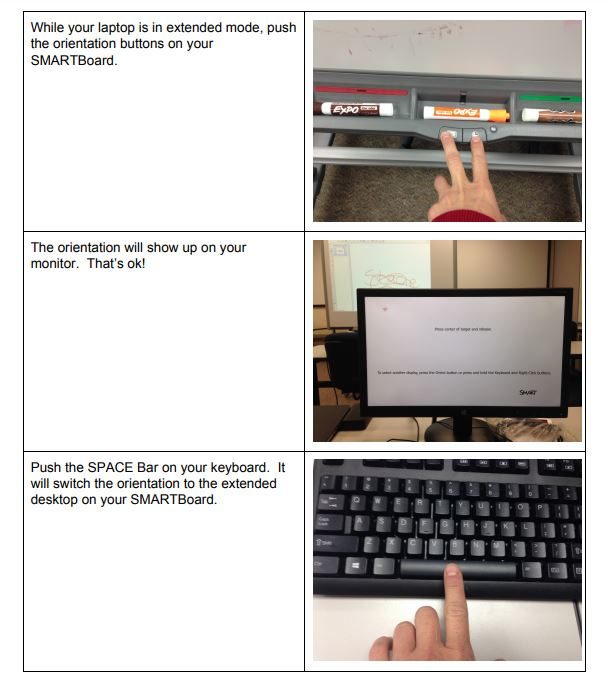
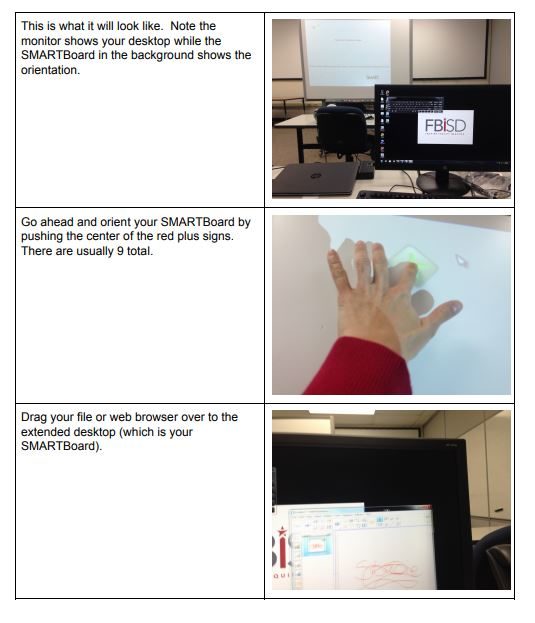
- While holding down the Windows key, press and release the P key.
- Click on the Display option you would like to use. …
- The Duplicate option gives the user the ability to duplicate the users monitor to a projector.
Software - Microsoft Office (4)
Default File Locations
- Open Microsoft Word
- Click File and then click on Options at the bottom of the menu
- Click on Save
- Under Save Document – on Default File Locations, click on browse….
- Browse to your z drive
- Once you have a location selected, click OK
Software (General) (8)
Here is what Netflix says about using Netflix in the classroom.
All requests for software, software subscriptions (including renewals) must be requested through the software request form. Instructions are on the form and you can find the form here.
IXL Quick Start Guide – general guide – this is not specific to APCSD
- How do I add a new student?
All students need to be approved via the CSE office BEFORE adding them into SAM. Please contact your CSE Chair. If the CSE Chair determines the student should be enrolled in the program, the CSE office will make the request to have the student enrolled.
- I have kids no longer using the program. How do I delete or deactivate them?
Please notify your CSE Chair that the student is no longer using the program. The CSE office will then make the request to have the student deactivated.
In late June, the district technology office will deactivate students in SAM for the school year.
- How do I edit the dates for marking periods?
Please make a request, via track-it, to change your marking period dates.
- How do I connect to the SAM?
You must be logged into our local network (apccurr) to access SAM
- How do I print out a list of Student User names and passwords?
Please enter a request, via track-it, for the report.
- How do I change a student’s SRI reading level in SAM?
- I need help troubleshooing my usb headphones and microphone.
Manuals
Wireless (5)
As of August 2016, There is wireless access throughout all buildings in the district.
School-Owned devices will connect to the wireless network called APCSD, APCSD-Devices or WaRr10R
Note: We are in the process of phasing out WaRrioR and APCSD-Devices and will make the announcement in the Fall of 2016 when all of the school-owned devices will connect to APCSD.
Employee’s personal devices will connect to the wireless network called BYOD. You will be asked to authenticate using your apccurr user name and password. Example jonest and apccurr password.
Note: Employee personal devices will NOT have access to our local network (z drive, p drive, printers) but will have Internet Access.
Student’s personal devices will connect to the wireless network called BYOD. You will be asked to authenticate and you can use your apccurr user name and password. Example 16smithj and apccurr password.
Note: Student personal devices will NOT have access to our local network (z drive, p drive, printers) but will have Internet Access.
Approved Guests (Example a guest presenter) who wants to use their own device, will connect to the ApprovedGuest network and when you need a user name and password, one will be provided. Please request a guest user name and password 24 hours in advanced of time needed. Contact a member of the District Technology Office.
Please remember there are many models of devices.
If you have a google pixel, please contact the District Tech Office for instructions.
Yes, by law we are required to filter the internet for the safety of our students. If there is a site being blocked that is needed for educational purposes, please request that site be unblocked and the technology office consider the request. Contact any employee of the District Technology Office for this request.
Our filter has to inspect you tube traffic to see if it is appropriate and safe to load. On your personal device you will need to install a certificate in order for this inspection to work. The District Technology Office cannot support your personally-owned device. You can install the certificate yourself. To install the certificate, you can find it here .
You can proceed to install this certificate. Install instructions are specific to your device. You can research how to install this on your particular device.